Keeping your ice bath water clean, safe, and reusable is crucial—especially if you’re plunging regularly. A proper filtration system not only improves hygiene but also saves you time, money, and the hassle of constant draining and refilling. In this guide, you’ll learn how to build a powerful, budget-friendly DIY filtration system for your at-home ice bath.
🧰 Equipment You’ll Need for a DIY Cold Plunge Filtration System
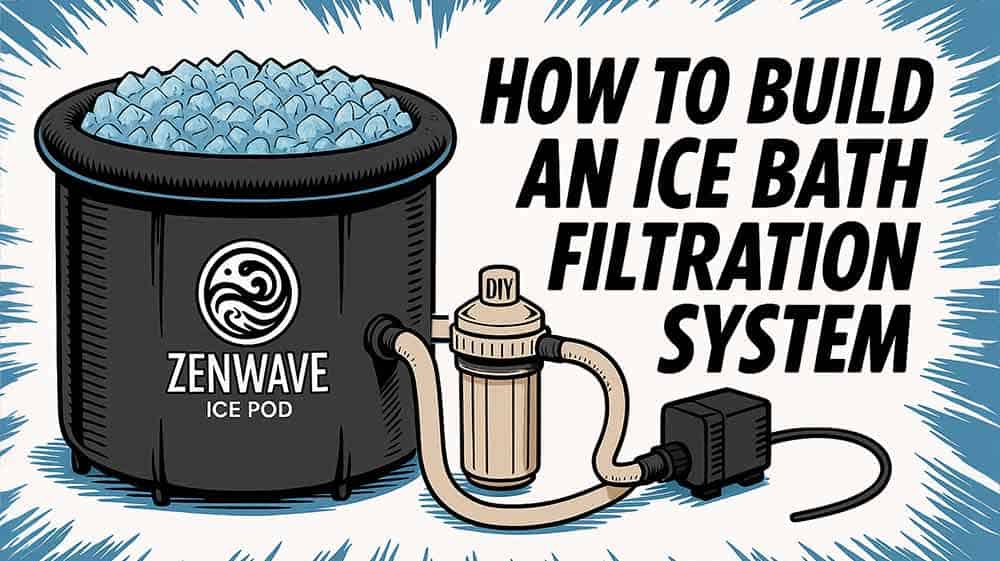
Before you get started, gather the following components:
- Water Pump – A submersible pump such as the Danner 950 or 1200 GPH model
- Filter Housing – A 10″ x 2.5″ GE whole house filter housing with a bypass valve
- Filter Cartridge – A 50-micron pleated polyester filter for effective particle removal
- Tubing – ¾” inner diameter braided PVC tubing
- Fittings & Hose Clamps – Barbed fittings and stainless steel hose clamps
- Plumber’s Tape – To seal all threaded connections
- Ozone Generator (Optional) – Adds an extra layer of sanitation
- Venturi Injector (Optional) – For ozone delivery into the return water line
🛠 Step-by-Step: How to Assemble Your Ice Bath Filtration System
1. Set Up the Ice Bath Tub
Place your tub on a level surface with easy access to electricity. Leave space around the tub for your pump and filter setup.
2. Install the Water Pump
Submerge the pump inside the tub. Connect the intake tubing using a barbed fitting and secure it with a stainless steel hose clamp.
3. Connect to the Filter Housing
Attach tubing from the pump’s outlet to the filter housing’s inlet. Wrap all threaded parts with plumber’s tape to prevent leaks.
4. Insert the Filter Cartridge
Place the 50-micron filter inside the housing. Tighten the cap securely to ensure water is forced through the cartridge.
5. Return Filtered Water to the Tub
Run tubing from the filter housing’s outlet back into the tub. Secure the return line so it stays submerged or flows quietly into the water.
6. (Optional) Add Ozone Sanitation
To kill bacteria and extend water life, connect a venturi injector and ozone generator to the return line.
7. Test the System
Fill the tub and run the pump for 10–15 minutes. Check for leaks and confirm steady water circulation.
💡 Alternative: Buy a Water Chiller With Built-In Filtration
If you want a plug-and-play solution, consider investing in a water chiller that includes an integrated filter. These units not only maintain consistent cold temperatures but also keep your water clean with minimal effort.
Benefits of Using a Water Chiller:
- Maintains ideal water temperature automatically
- Integrated filtration minimizes maintenance
- Plug-and-play setup for home use
- Quiet and energy-efficient options available
Explore options in our best water chillers guide.
🧼 Maintenance and Cleaning Tips
Keep your system running efficiently with these best practices:
- Replace the filter every 4–6 weeks or if water flow weakens
- Flush the housing monthly to remove debris and buildup
- Disinfect weekly using a diluted hydrogen peroxide rinse (especially if not using ozone)
Related: How to Use Hydrogen Peroxide in an Ice Bath
Benefits of an Ice Bath Filtration System
A home filtration system can transform your cold plunge into a low-maintenance wellness tool:
- ✅ Reduces the need for daily water changes
- ✅ Keeps water free from dirt, skin oils, and biofilm
- ✅ Supports frequent use without sacrificing cleanliness
- ✅ Helps prevent skin irritation and bacterial growth
Final Thoughts
A DIY ice bath filtration system makes cold therapy more sustainable and enjoyable. With a few affordable components and basic assembly, you can extend water life, improve hygiene, and save yourself from unnecessary maintenance.
Build it once. Use it for months. Your cold plunge just got an upgrade.